
目次
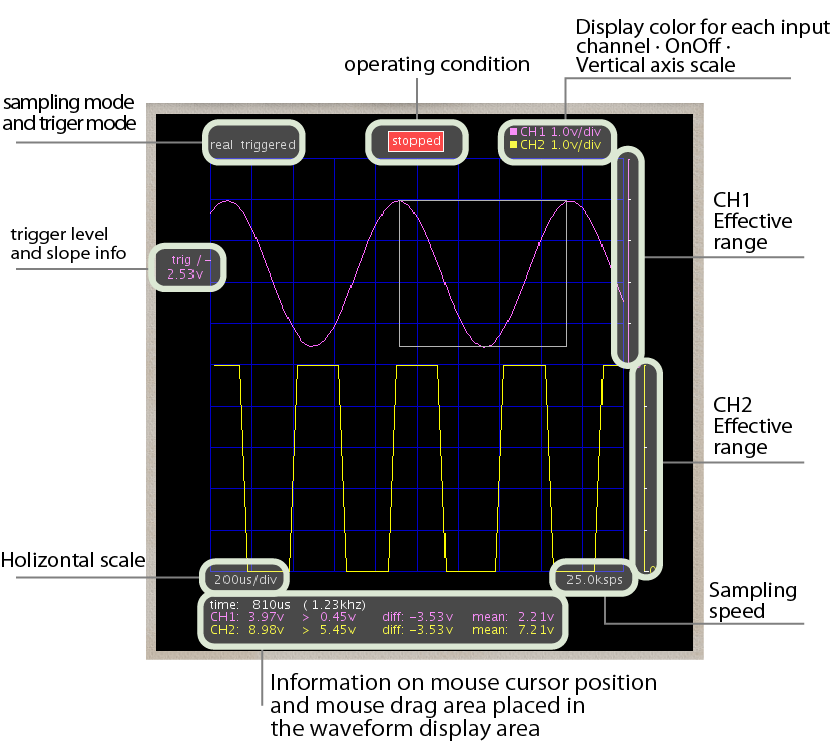
| Real time sampling rate: | 50 k sample per second (non-DUAL mode) |
| Equivalent time sampling rate: | 1M sample per second (non-DUAL mode) |
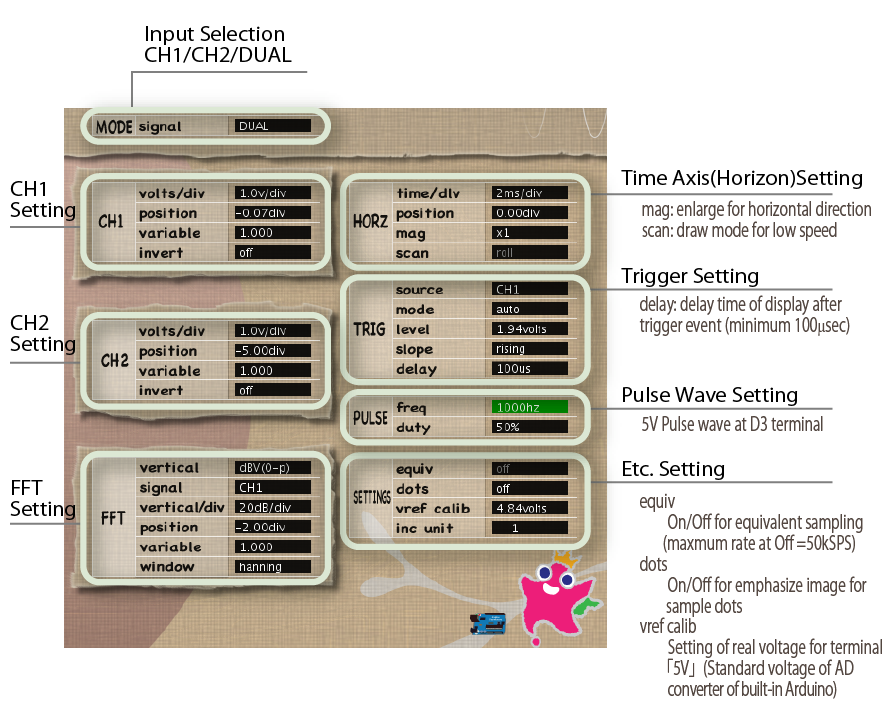
| Chanel: | CH1/CH2 |
| Trigger: | CH1/CH2/EXT Rising edge/Falling edge AUTO/NORMAL/SINGLE |
| Input signal: | 0 – 5 V DC |
| Time axis: | 1micro sec/div – 5 sec/div |
| Etc.: | FFT function Generation of Rectangular wave |
| Support Arduino: | Arduino with ATmega328 (5V, 16MHz) e.g. Uno/ Duemilanove/ Nano etc. |

| v0.75 | Mar 06, 2023 | adapted to fit Processing-4.2 |
| v0.74 | Oct 28, 2021 | adapted to Processing-4.0b2 |
| v0.73 | Apr 10, 2019 | adapted to Arduino-1.8.9 |
| v0.72 | Mar 20, 2016 | adapted to Arduino-1.6.8 |
| v0.70 | Oct 07, 2015 | adapted to Processing-3.0 |
| new features: ac/dc coupling ui, screen capture | ||
| some improvements and bug fixes | ||
| v0.52 | Feb 22, 2013 | to fit Processing-2.0b7 |
| v0.51 | Oct 29, 2012 | bugfix |
| v0.50 | Mar 20, 2012 | 1st release |

2026年度以降の分野


2025年度以前の学科


各種情報


教育の取り組み